Pumped Up Pumpkin Cheesecake

Welcome back fellow
Skinny Grocery List:
Remember I always say to make a list...it just makes life easier ;).
Cake Filling -
1/2 to 1 C Pure Pumpkin - I love Libby's All Natural 100% Pure Pumpkin...Great Brand!! I used 1/2 a cup but I am confident that a little kicked up pumpkin flavor would be just as amazing!
2 Packages Reduced Fat Cream Cheese - I know all of us do not have access to a great variety of all natural and organic foods but with Dairy I really couldn't stress going natural more. I go for Horizon's Organic Reduced Fat Cream Cheese - No Fillers!
1.5 Tsp. Cinnamon
1 Tsp. Nutmeg
1 Tsp. Vanilla Extract
1 Packet of Gelatin
1/2 to 3/4 C Stevia in the Raw - Stevia is your best choice when choosing a sugar substitute - You can add up to 3/4 C and still maintain a great flavor - I went with 1/2 C.

Cake Crust-
1 C Almonds - I chose slivered almonds due to
3 Egg Whites
1/4 C Stevia in the Raw
1/4 Tsp. Cinnamon
1/4 Tsp. Vanilla Extract
1/4 Tsp. Sea Salt (you can always sub with table salt)
Non-Stick Spray

Gadgets and Tools:
Blender
Mixer with Whisk and Beater attachments
Pie Pan or Spring Form Pan
Spatula
Measuring Spoons
Measuring Cup
2 Mixing Bowls and 1 Small Bowl
PMA - Positive Mental Attitude - A must in our kitchen :)

Delicious Directions:
Preheat oven to 350 Degrees
Pull Cream Cheese out so it can soften
In your blender place Almonds, Stevia, Cinnamon and Salt - Blend until coarse
 |
| 1) Add Almonds 2) Add Sugar 3) Add Cinnamon 4) Add Salt |
Place 3 Egg whites and 1/4 Tsp. Vanilla Extract into your mixing bowl and whisk with your mixer on high until fulling blended
Stir in Blended almond mixture and whisk until fully mixed and smooth
 |
| 5) Blend until Coarse 6) Add Vanilla & Eggs into Mixing Bowl 7) Whisk until Blended 8) Whisk Almond Mixture and Eggs |
Spray pan with non-stick spray and pour in our batter, spreading evenly
Bake on the middle rack for 8-10 Minutes (9 was perfect for me!)
 |
| 9) Should Look this :) 10) Now Mix with the Spatula - Don't forge the sides ♥ 11) Spread evenly in your Pan 12) Bake on the Middle Rack |
Crust should come out firm with a little give, just like a soft cookie :)
 |
| After Fully Baked it shoud have Cookie Texture - I LOVE COOKIES!!! |
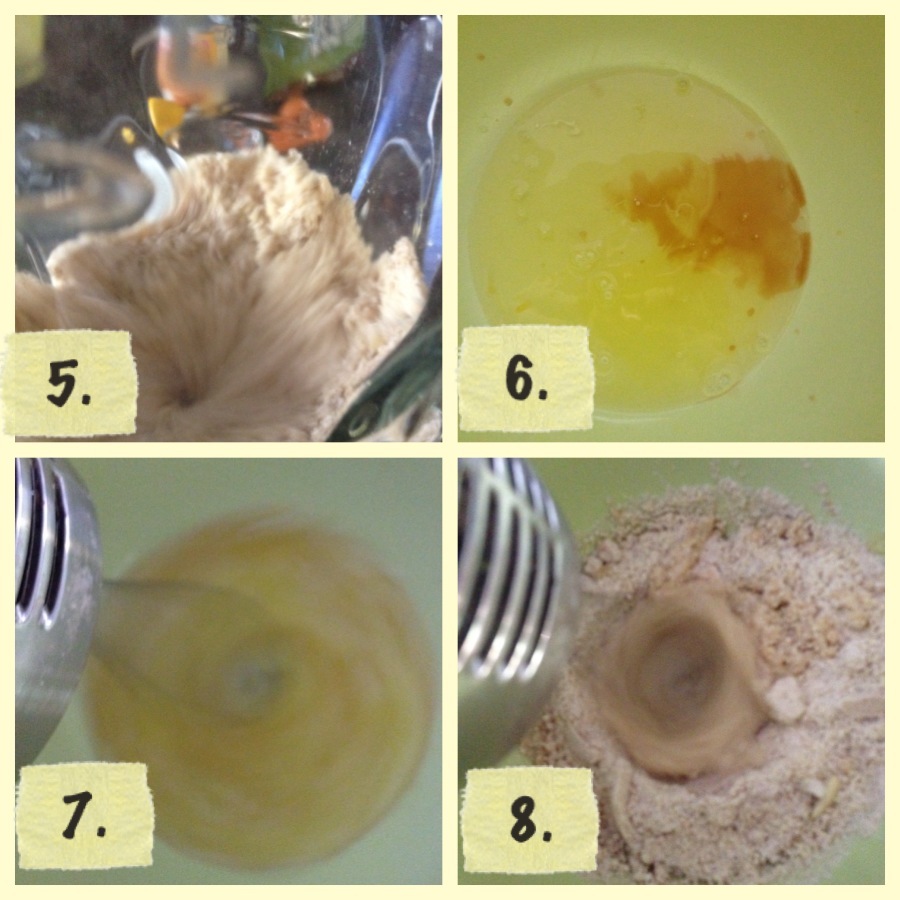
Next take 1 gelatin packet and place into a small bowl
Now measure 1 Cup of water and microwave until boiling
Add water to gelatin and stir - wait until mixture turns clear before using
 |
| 1) Pour Gelatin into a Small Bowl 2) Add 1 Cup Boiling Water 3) Following directions - Wait until it Dissolves 4) Add Softened Cream Cheese to Bowl |
Next in your other mixing bowl add cream cheese, pumpkin, vanilla extract and Gelatin
 |
| 5) Mix Cinnamon, Nutmeg and Sugar and Add to Bowl 6) Add Pumpkin 7) Add Vanilla and Gelatin 8) Blend - Note: User Beater Attachment first then Whisk!!! |
Now Start with your beater attachment and mix the above ingredients
 |
| This is me being lazy and skipping steps! I went right to whisking and had to call in the cleaning crew! Beat then Whisk...Trust me ♥ |
When mixed well follow up with the whisk attachment to ensure zero lumps or bump (We hate Lumps and Bumps!)
Once your filling is fully mixed evenly distribute over your cooled crust and refrigerate 4 Hours Prior to serving (Sorry guys! This wait is excruciating!)
 |
| Evenly Distribute Mixture in Pan and Refrigerate |
Time for clean up and we are done!!!!
Enjoy your hard work! This is great paired with a yummy sugar free Vanilla Latte! Mmmm
 |
| Yum! All Done! Enjoy! |
Also keep in mind this is a dessert and not a meal so its ok once in a while to indulge a little, but I do not suggest adding this into your meal planning rotation...I tell you because I love you! XoXo
Skinny on the Nutrition:
Yields 8 Servings
Calories..............................220
Fat......................................20g
Carbs.................................7.75g
Sugar.................................2.75g
Protein................................8.25g
Fiber..................................2.25g
***Note: All Nutrition is based off of brand recommendation and serving size.
See you again next week! Muah Muah!
XOXO,
Magan

No comments:
Post a Comment